Letting your cardstock take Center Stage
You know me...I love the layered page...I love techniques...I love distressing....but every once in a while -- I want to get back to the basics. These two pages were really about letting the cardstock be the basis of the page....and I like how they turned out. They are from two extremes of Weston's life -- but in both -- he clearly knows how to work the camera...
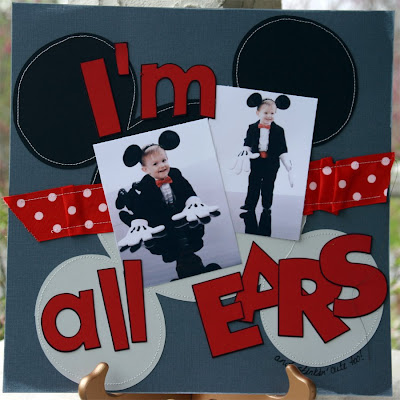
In this first one, I tried to make the Mickey Ears reflect the "REFLECTION" of weston in the pictures.... I think that the red pops off the page a bit more because I outlined the letters....just an idea. If you are using a Cricut, you can use the Cricut Color Markers before you cut out your shapes and they will come out evenly outlined...a time saver and a nice touch.

On this layout, I used one of the Cricut Shapes from the Graphically Speaking cartridge. It is an element that I think was intended as a "foundation" shape for a mini-book...but I resized it to FILL THE PAGE....and I love the rounded edges and all the little holes down the side....very graphical -- and would be fun to also add other colors of paper behind it. The largest I could get it to cut was about 11x11 -- so I could have put it on another piece of patterned paper or cardstock to make it a 12x12 -- but I liked the "see through" element so just kept it as is.

In this first one, I tried to make the Mickey Ears reflect the "REFLECTION" of weston in the pictures.... I think that the red pops off the page a bit more because I outlined the letters....just an idea. If you are using a Cricut, you can use the Cricut Color Markers before you cut out your shapes and they will come out evenly outlined...a time saver and a nice touch.

On this layout, I used one of the Cricut Shapes from the Graphically Speaking cartridge. It is an element that I think was intended as a "foundation" shape for a mini-book...but I resized it to FILL THE PAGE....and I love the rounded edges and all the little holes down the side....very graphical -- and would be fun to also add other colors of paper behind it. The largest I could get it to cut was about 11x11 -- so I could have put it on another piece of patterned paper or cardstock to make it a 12x12 -- but I liked the "see through" element so just kept it as is.

Hope you are having a good week. I would love to see your projects where you let your cardstock take center stage....link them here for us to see.


both layouts are gorgeous....
ReplyDeleteLove love love the Soar page....Simple, yet perfect... I might lift this one