Posts

Showing posts from 2009

Mini Album Made from Medical File Folder

FINALLY! I am finally getting around to creating some YouTube videos to share creative ideas and tutorials on some of the projects I have done for our What You Make It television show. Here is my first video...so be kind -- but seriously, give me feedback and let me know what you think...or what kind of projects you would like to see. You can watch the Searching for Winter - Mini-Album video on YouTube. This project entitled "Searching for Winter" was a mini-album that I created as a Father's Day Gift for Royce about the time he arranged forWestonto be in a local independent film (when he was in the 6th grade. The film was shot over several months and there were LOTS of stories and adventure associated with the project. Not everything we want to remember will fit neatly into a scrapbook album -- and I LOVE mini-albums for those kinds of projects. Using this medical file folder gave me LOTS of places to add tons of pictures and journaling...and at the back -- a place ...

In Character

Image
I love the new cardstock that Jenni Bowlin has created with Coredinations. It is embossed and is made of two contrasting colors -- this one is red behind black. When you sand it -- the red is revealed in the pattern of some of her papers. It is delightful! I used my cricut to cut out the large label shape -- and then used some temporary tape to tack it onto the page. Then I took some sandpaper and wrapped it around a stamping block so that I would have a fairly large flat surface with which to sand. The die cut kept me from sanding the cardstock where it was sitting so it left a great place to put my photo. I thought the background had a bit of a stamped leather look -- so decided to use it for the picture of Royce when he was headed out to PowWow (Royal Rangers -- camp) -- the men always go as guys from the 1800's -- and the character he has developed over the years is Trader Gray . The boys love to come up with something to "trade" with him for -- so he has amass...

You Have My Heart

Image
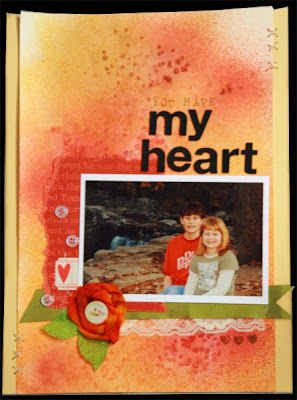
I have had this picture of my niece and nephew for awhile -- but haven't been totally sure how I wanted to scrap it....so it has been sitting on my table for me to look at until I knew. When I finished this background (as part of my techniques class) -- I just knew that this picture would finally find its home! The background was created with Adirondack Color Wash and Sea Salt....I KNOW -- I never would have dreamed that one up -- but Julie (our teacher is FANTABULOUSLY creative! You can still take this class from her -- and I would highly recommend it. You can learn more about her art -- and her class HERE. I wanted you to see a bit closer detail of the "rose" I created for this page. Are you ready for another shocker?!?! That is made from a baby wipe! I bet you are thinking "Is there NOTHING she won't keep and try to use?!?!?" *laughing* The answer is "probably not!" The baby wipe got saturated with color wash during my "technique s...

Practically Perfect

Image
I am taking the MOST fun class with Julie Fei-Fan Balzer! She is Amazing! You know the kind of artist that just makes you sit and stare at their work...well she is one of those. You need to check out her blog . Anyway -- as I said, I am taking an on-line techniques class with her -- and I am finding I am ending up with lots of yummy bits and pieces. So what do you do with bits and pieces? Well -- they kind inspire me to quilt. Even when they are paper pieces. So this is a layout I created with several of the scraps of paper I have created during my class homework assignments. I love this picture of my sister...it captures the JOYFUL side of her -- and that is just ONE of the many reasons that I think she is PRACTICALLY PERFECT in every way....kind of like Mary Poppins! Have a lovely rest of your week!

Just a Minor Baby Step Blog

Image
This year started out so strong -- so many creative ideas....that needed exploring....and then -- well....then LIFE -- the big ole capital letters version of LIFE stepped in. So much of it it...all at once...and then it felt lie it did a big ole DOG PILE on top of me. Those of you that know me well -- know that being creative is an outlet for the stresses and the strains of life....and the fact that there hasn't been much creativity to show for the past few months should tell you that I have not been in a place to be doing much creativity. But I do truly Believe that is going to begin to change! I have been back in my studio -- bit by bit...and it feels GREAT. I am taking a wonderful on line class from Julie Fen Fan Balzer. She is amazing Check her out here. ..and has gotten my inspirational brain in gear....so hopefully you will be seeing some more creative activity from me soon. One other thing of note...my very favorite camera producer...THE POLOROID...has a new printer/cam...

Chosen

Image
There are so many reasons that I love scrapbooking...the fact that I know I am creating a collection of pictures and stories that are important to our family...and the those family members that are not here yet -- and some I may not ever have the privilege of meeting. They will know more about us than I have been able to find out about my ancestors....I think of it as my gift to them. And while that is the BIG motivator for me most of the time...another thing that I love about scrapbooking is the fact that sometimes it gives me the opportunity to create a meaningful gift for someone else. This shadowbox is an example of that...I created it for a baby dedication we were doing this past weekend at our church. "Champ" is the little boy -- and what a cutie, huh?!?! He was adopted when he was just almost a year old....so we didn't really have "baby" pictures to work with....but I think the ones we chose to work with were just precious. I used three pictures and...

On-line Gift Certificates

Ok...so today is a bit non-craft/scrapbooking related -- but it could help you get some new crafty stuff....so read on! I know we are all looking for ways to save money in these economic times -- and I found one way I wanted to share with you. It is called SWAGBUCKS! Here is how it works...you use their search engine (powered by Google) for the internet searches you would be doing anyway...and each day you are awarded or win a certain number of SWAGBUCKS. (You must be signed into your Swagbucks account) but it is really simple -- and each day you have to potential of winning 1-5 Swagbucks...I haven't ever won more than 3 -- but I see others get 4 or 5 -- so know that it is possible. Honestly -- once you win for the day -- you can continue to use it or go back to your normal search engine because you only win once a day. Your account accumulates your Swagbucks...and then you can redeem them for gift certificates or other items. Pretty cool -- and TOTALLY FREE! To get started.......

Tear It Up

Image
I had so much fun in Houston last weekend visiting one of my best friends, Mona. She has a lovely home -- and three beautiful grown daughters that love to come over and spend time with their mama. I love spending time with them too -- and they brought their absolutely precious kiddos with them. It was beautiful weather (which if you know Houston -- is a rarity due to humidity) and we spent time sitting on the porch talking and laughing...and almost as much time around the kitchen island cooking and talking and laughing. It was just the best few days...so good for my soul. One afternoon I had the opportunity to take a few pictures of the newest member of their family...NASH. With beautiful natural light on the front porch, we just threw some blankets down and started snapping pics. He is so beautiful. I just had to scrap a few of them -- and will post a few more later this week (gotta get those dreaded taxes done before I can play!). The page above was created by using some scra...

Pictures aren't ALWAYS necessary

Image
I know that is almost scrapbooking heresay, right?!?!? Seriously, if you have a story to tell, but no picture to go with it -- you STILL need to tell the story. I decided to let a bit of my "artistic" self emerge to create the setting for this particular story. So I had fun with paint and stamps...making sure to leave room for the STORY. Do you have a story to tell? I can't wait to read it! Go for it.

Letting your cardstock take Center Stage

Image
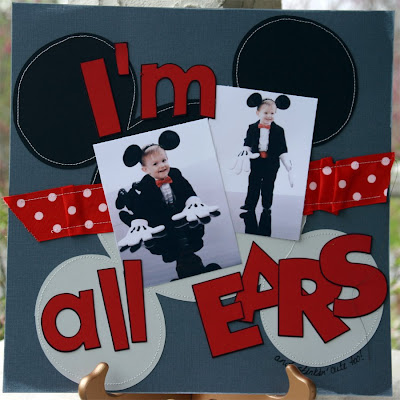
You know me...I love the layered page...I love techniques...I love distressing....but every once in a while -- I want to get back to the basics. These two pages were really about letting the cardstock be the basis of the page....and I like how they turned out. They are from two extremes of Weston's life -- but in both -- he clearly knows how to work the camera... In this first one, I tried to make the Mickey Ears reflect the "REFLECTION" of weston in the pictures.... I think that the red pops off the page a bit more because I outlined the letters....just an idea. If you are using a Cricut, you can use the Cricut Color Markers before you cut out your shapes and they will come out evenly outlined...a time saver and a nice touch. On this layout, I used one of the Cricut Shapes from the Graphically Speaking cartridge. It is an element that I think was intended as a "foundation" shape for a mini-book...but I resized it to FILL THE PAGE....and I love the rounded e...

Fun with Embossing

Image
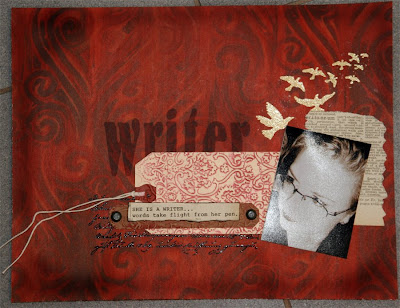
I have used two different kinds of embossing on this layout. The birds and the script underneath the tag are both stamps that I then used embossing powder on and then heat set. The tag is something new that I just discovered you can do with your Cuttlebug. If you will ink your Cuttlebug Embossing folder(any kind of ink other than permanent ink like Stazon) prior to running your paper or tag through the Cuttlebug you will get a very interesting embossed background. I tried inking both sides of the embossing folder and found I like the results best on the side that actually has the Cuttlebug logo printed on it. When you are done, just use a baby wipe to clean off any remaining ink. My mind is spinning with fun new ideas...and will be sure and post them here. Hope you have had a good Saturday...is it Spring where you are?

A Couple More Edgie Ideas

Image
I had a great time Friday Night with my scrappy girls! It was cold and messy outside -- but as usual it was warm, fun, friendly and full of encouragement inside! I had a couple more ideas about how to add an "edge" to your page and thought I would share them with you. In the layout above (ok...how funny is that picture of me and my sister putting on a "show?") I used a piercing tool to prepare my layout for some hand stitching (I wanted to add a bit more orange to the layout). Then before i did the sewing, I used some distress ink in a similar tone to the background cardstock to darken the edge...then went ahead and added the orange stitching. On the layout below -- I simply used a pencil and a scalloped edge ruler to mark the scallops onto my background. I then painted with white paint on the outside of the scallops and finished it off with a sharpie giving a good thick line to the edge.

Create an Edge to Your Layout

Image
I love this picture of my two nieces. Lindsey got to go visit her new sister in Guatamala. I wanted a little bit of an edge to the page -- but didn't want to distract for those cute little owls or the picture -- so I stitched close to the edge and then used a bit darker distressing ink and rubbed it into the edge. I like the effect...an instant subtle border. Try it...and let me see what you come up with.

Create a Stamping Mask

Image
I love the special look of a die cut edge...but I also like them in smaller sizes than they usually come in -- so I decided to try and make my own. I used a corner and edge punch by Fiskars and then trimmed along the shapes to create the wavy edge. To set off the edge, I used some distress ink to darken the outer edge. I also wanted to stamp just on the inside part of my card. To do that -- I created a mask out of a piece of scrap paper. I placed the mask over my decorative edge and stamped with my script stamp to fill in the center. This is an easy technique to use anywhere on a layout. You can create a shape and then stamp inside of it on your page. Lots of possibilites. Have a great week.

Paint Rags as Art -- the color of GREEN

Image
I wish that I could give you a huge list of things that I am currently doing that would be considered "green." But, in reality, I am taking baby steps. A layout that you will see later this week was inspired by a moment of exasperation when yet ANOTHER yellow pages book showed up on my doorstep. It feels like these HUGE books get outdated faster than they can be printed -- and with competitive books -- it just means that the number you are likely to get is doubled. I hate the idea of throwing out pages and pages of paper into a landfill...so I looked at the book a little and decided there were at least TWO uses I could repurpose it for. The first was as a leaf/flower press. I am going to try and do some mono prints with natural materials...and having them FLAT is a key part of that....so now that book is my official press. I took a few minutes and added some wax paper between several spaced out pages...and it is ready and waiting for spring and my mono-printing project. The f...

Gel Medium Transfer

Image
Journaling: Serenity on the face of a woman captures a sense of eternity in a way that beauty never could. I have tried lots of ways to take an image and transfer it to paper or fabric -- and this is one of the easiest. One of the things I like, is that you can print the image out on your own ink jet printer -- on a transparency. Remember that it will transfer "backwards" so if there is writing on your image, you will want to select print mirror image on your printer settings. Here are the steps for doing the transfer: 1. spread a generous amount of gel medium (gloss or matte) onto your paper or fabric. I really can only tell that I have enough by spreading it out with my fingertips. It needs to be very moist and "slickery." 2. Quickly put the image (printed side down) into the gel medium and let it sit for at least 30-45 seconds. 3. Take a spoon and begin to rub from the center to the edges fairly firmly. Because it is a bit slippery, use one hand to ho...

Working With Embossing

Image
For this card, I really wanted the leafy background -- but I also wanted to make sure I had room for the stamped word "passion." First, I stamped the word "passion" with red ink and embossed it with clear embossing powder. Then I used clear embossing ink and stamped the background and sprinkled espresso embossing powder. Before I used my heat gun to melt the powder, I took a soft paint brush (soft works much better than stiff) and holding the card upside down, I brushed away the powder that was covering up my previously stamped word. Once I had removed the extra powder, I heated the background. The embossing powder acts as a resist so I could then rub distress ink into the cardstock and stain the paper with various colors to create the multi-hued background. It sounds like a lot of steps...but it really is very simple...try it!

Stamping on Acrylic

Image
Similar to the stamping we did on the buttons a few days ago -- you can also stamp on a sheet of acrylic or a transparency to give added dimension to your embellishments or pages. You will need to use solvent ink (like Stazon) and give it a few minutes to dry before handling -- but I love the look of stamped images over other elements on my page. On this page, I stamped the tree and the butterfly in white and then put the piece of acrylic on pop-dots (in the corners -- hidden by the eyelets and twine) to raise it up off of the sheet of butterflies. I also used rubons (American Craft -Jane) to add the word, flutter . Below is the finished page. I saw an ad in Anthropologie that showed a window with this pale blue color behind it -- it was filled with butterflies and was totally inspired to try and recreate it a bit. Journaling reads: It is my nature to worry and when things are not going quite right, my heart begins to flutter with anxiety. I am so glad that my Father in heav...

Gesso-ing Book Paper

Image
I am just a fan of words...in all shapes and forms....so using book pages as part of a background is a natural for me. However, sometimes your images can get lost on the page because of the strength of the words on the book pages...so what do you do to "tone it down" a bit? Gesso. Gesso is slightly chalky -- but is very opaque (which is why it is good for covering things up as a primer)...so you want to be a little careful how you use it or you will totally obliterate the words from your background. I have found that if you load your brush with gesso and then use a paper towel to "brush off" most of the excess gesso -- you will get a nice "dry brush" effect that softens the words or images on your background papers -- still allowing them to be visible, but not dominant. The other thing I did on this card was to dry brush just a touch of cream color acrylic paint over the gesso -- I could have put the acrylic paint into the gesso to tint it (which I ...

Inking with Embossed Resist

Image
This technique has so many variations, it could keep you busy for WEEKS! hee hee I think you will be seeing it from me several times in the days to come because my mind has been having fun thinking up new projects to try out -- so hopefully I will have some to share soon. Let me share with you the basics...and then I would love to see what you come up with. Basic Embossed Resist Technique: 1. Ink a stamp with embossing ink. 2. Sprinkle the stamped image with embossing powder (clear or tinted). 3. Heat the embossing powder with a heat gun until melted. Let cool. 4. Apply distress or chalk inks in multiple colors to background. 5. Wipe the excess ink off of the embossed image with a baby wipe. A few variations you might want to try: 1. Use colored ink for your stamped image. 2. Used tinted embossing powder (or put different colors on different areas of the image). 3. Collage multiple stamped images. 4. Use Distress Embossing powder -- and rub the release crystals off prior to inki...

Stamping on Buttons

Image
I am so excited about this Monday morning...I think there is something fresh and new about the beginning of a new week. Hope you are anticipating a great week too. Today's card started from a scrap of vintage wall-paper. I sometimes think I am an "old" lady stuck in a young woman's body -- just because of the things that I love! There really wasn't much needed for this card after I glued the scrap of paper to my card...just wanted to pull out some of that red and green in the embellishments...and chose a couple of buttons to do that. They looked too "modern" on the page...so I decided to stamp a bit on them. To stamp on plastic you need to use solvent ink (Like Stazon or Archiver Ink by Ranger). Because of the rounded surface on buttons, I have found that small stamps work best. You can stamp and turn the button several times until it has been covered with the image the way you like. Just tie a bit of twine through the buttons and add to your page.....

Stamping on Material

Image
Add stamped images or words to a card or layout by putting them on material. I like the frayed edge of this label (I ripped the fabric rather than cutting it to give it the frayed edge). To get a crisp image don't use chalk or water based inks...they will absorb and blur when printed onto the fabric. I use solvent inks like Stazon on Archival Inks by Ranger.

Faux Marble on Acrylic

Image
I am having so much fun playing with acrylic scraps these days. I used a left over piece of Hambly Clearly Heavy overlay to for the foundation of this card. I put the piece through my cuttlebug and cut out the flower shape...and stamped the petals with Stazon Opaque White. To create the look of marble I used three shades of blue alcohol ink (with a bit of liquid extender) on a felt pad and pounced them over the acrylic card...leaving the flower blank. Let the ink dry and then repounce. Finally, I backed the card with a piece of white vinyl. The vinyl has texture and adds depth of color to the ink stained card. Embelish with doodling and liquid pearls.

Faux Wax Seal

Image
This is another fun "faux" technique. To create this faux wax seal I used embossing ink, UTEE (ultra thick embossing enamel) powder, heat gun, small piece of chipboard, Perfect Pearls, a bit of acrylic paint or some alcohol ink -- and finally a rubber stamp or wax stamp. It is also helpful to have a pair of tweezers Begin by cutting a circle out of chipboard slightly smaller than the size you want your finished "seal" to be and covering with a good coat of embossing ink....and sprinkling UTEE powder to cover. Sprinkle a mound of UTEE powder on a scrap piece of paper for dipping. Melt the powder with your heat gun (holding it with tweezers) and then immediately dip the chipboard in the little mound of powder while it is still warm...and then melt that layer as well. Continue this process -- along with sprinkling a bit of Perfect Pearls onto the top dipped chipboard in between meltings. Let the UTEE melt over the sides. When you get a thickness that resemble...

Masking Tape Technique

Image
I love the look of old book papers...or printed leather...and I think this technique gives me a feel of that with just a couple of steps. First begin by covering your substrate with torn pieces of masking tape. Overlap them at odd angles for the best results... Next brush a thin layer of mod podge over the surface and let it dry. Finally, create a tinted glaze by adding water to acrylic paint. If you want it to stain darker use less water...the lighter you want it -- use more. Brush the glaze over your background and let it stand for a few moments, then use a paper towel to wipe it off. Repeat to add depth...and maybe even change the color of the glaze to give it even greater depth. It's as easy as that.

Creative "Something" Day Thirty

Image
I am feeling the need for a little sunshine today. Actually, when I woke up this morning -- the clouds were gone...and there was just the hint of a sunrise. The birds were certainly taking advantage of it. Oh, I know that winter still has many more days ahead -- but I love when you get a hint of the spring to come. Today's card is my only little bit of sunshine. It is a gesso - resist technique. You first put the gesso down on your background...I used white...but you can tint gesso with acrylic paint to make it whatever color you like. Gesso has a chalky base...which makes it resist the Distress Inks (by Ranger and Tim Holz). After you rub in two or three colors of the distress inks (I chose shades of yellow, orange and red) -- spritz with water...it gives a water stain effect...and the bit of dampness lets you wipe away the bit of ink that is on the Gesso. I then stamped with archival/solvent ink (like Stazon) and embellished. Hope you have found a little sunshine in y...

Creative "Something" Day Twenty-Nine

Image
Oh Yes...is it cold indeed here! This is a fun little technique I thought I would share with you...putting a picture under an embossed transparency! Am having so much fun with my cuttlebug lately...since I discovered that you can put thin acrylic through it...Like I did on these Heidi Swapp letters.... on this layout about my new niece!

Creative "Something" Day Twenty-Eight

Image
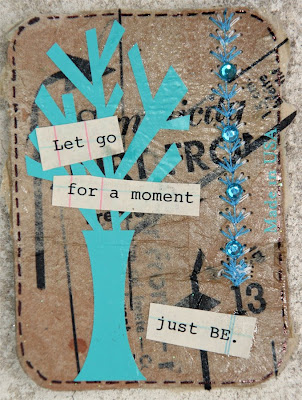
I love my old typewriter. I love the sound of the keys striking the ribbon and making their mark on the paper. There is something very satisfying about touching the key and knowing that touch will actually CREATE words on a page. Don't get me wrong...I love all the things that my computer does for me...but one thing I like BETTER about my typewriter is that the INSTANT gratification of the printed word it gives me...yeah -- I am a bit "old school." Today's card started out as a thin piece of cardboard...to which I Mod Podged some scraps of a sewing pattern...If you look closely -- I was REALLY going for the SIMPLICITY theme because that word was actually part of the pattern...but in the end...it needed this little blue tree and the words, "Let go for a moment...Just Be."

Creative "Something" Day Twenty-Seven

Image
Brrrrr! It is veeeeery cold here today -- and rainy...just the kind of day to stay in, bundled up and sipping a hot cup of tea! That is exactly what I am going to do. I had three wonderful sections of classes yesterday -- but am so glad that I do not teach on Tuesdays and Thursdays...and that I work at home...cause I just don't want to get out in this mess today. This card's background is created by doing a paper basket weave like I did to create this Christmas stocking out of Basic Grey's Figgy Pudding paper. In order to make the stocking -- I created a 12 x 12 sheet of woven paper so to make the card I just did the same process in miniature. Here are the instructions: 1 Cut scrap papers into twenty-four (24) .5" x 6" strips. Ink edges, if desired. (if doing a big background I recommend using 1" x 12" strips of paper) 2 Arrange 12 of the strips vertically along a piece of scrap cardstock and lightly tack just the top with removeable adhesive. Thi...

Creative "Something" Day Twenty-Six

Image
Today's card is made from Tyvek...you know the paperish/plastic-ish material that mailing envelopes like those used by FedEx are made of? It really is both paper and plastic...and if you put a little water on it before you start -- it will absorb acrylic paint where it is paper -- and resist it where the little threads of plastic are...which makes for a kind of tie-dyed effect when you wipe the paint off... Just another idea to "re-use" those envelopes rather than put them in a landfill. Hope you are off to a great last day of January!

Creative "Something" Day Twenty-Three

Image
I have gone outside the last few mornings to find "Frost" on everything...brrrr! The trees, the grass and even the windows on the North side of my house -- all covered with a sheer coat of icy sparkly ''FROST." Seeing this inspired my card today....Hope you are warm whever you may be!

Creative "Something" Day Twenty-Two

Image
Ok...I admit it -- I am a distress "fiend!" There...I said it...and I am proud! We tear our paper....scratch it....stab it.....why not PUNCH it!?!?! I liked how this turned out -- this technique is DEFINITELY going to show up on a larger page. Technique Tutorial: 1. Save up a bit of frustration. (ok -- don't save it up -- it will still work, it just makes it more fun) 2. Use heavy weight cardstock, card board...or a tag. 3. Use your cropadile (I used my Big Bite so that I could just move the paper and punch) or any where hole punch and randomly put holes into your paper. Punch a LOT...don't be shy 4. Make sure they overlap in some areas...and let some of your punches go off the page. 5. Use distress inks (starting with your lightest color) to add color to your background in swirly motions. 6. Stamp an additional image in Archival ink (most others will react to distress ink and not print so test your ink before your work on your main piece. 7. Run a distress to...

Creative "Something" Day Twenty-One

Image
Maybe I am the only one who needs to be reminded of this. I am always having to speak the truth to myself that the grass ISN'T greener on the other side -- it just looks that way from a distance. Life is a journey -- and even if I LOVED everything about where I am at the moment (and I honestly, don't) -- I am not STAYING there...but I do feel that I need to make the most of wherever I find myself at the moment.

Creative "Something" Day Twenty

Image
Innauguration Day! I feel so blessed to live in a country where "We the People" are given the chance to say who we want to be our leader. If your guy (or gal) wins or loses...you still had the chance to speak up and have your voice counted. That is an amazing thing. Today holds much promise for our country. I pray for our new President that he will be a strong, good and wise leader. There are a lot of problems facing the United States right now -- but even still, because we have a choice in our leadership -- there is HOPE. Today's Creative "something" was created with a collage stamp and some water colors...Be sure and use Stazon ink if you want to watercolor after you have stamped your image. Have a great day!

Creative "Something" Day Nineteen

Image
We had snow today -- ok...it was really just a "skiff of snow" -- but snow nonetheless. Hope you have had a good day wherever you are!

Creative "Something" Day Seventeen and Eighteen

Image
Day Seventeen: Had some fun with aluminum tape (got it at Loews -- I think it is used to seal airconditioning duct). Stuck a couple of widths down to cardstock...and then rolled it through the Cuttlebug in an embossing folder. Love love LOVE all the texture you can get with that. Then I dripped some alcohol inks onto the surface. They work GREAT with metal and acrylic -- really any slick non-porous surface. Am going to have to try this again. Sorry for the delay in posting...was just super busy with the What You Make It crop on Saturday. We had sooo much fun. I totally loved getting to know the ladies I had never met before that were able to attend. And I have to say that it was equally fun to get to spend some time with friends from the past too! I will be posting pictures later. This little card came out of another project. I was working on staining some other tags, and got huge drops of Walnut Stain (in eggplant color) all over my craft sheet. Just dipped this tag in th...