Gelli Printing: Introduction
Oh my friends...
I could have titled this blog...The best messy kind of fun EVER!
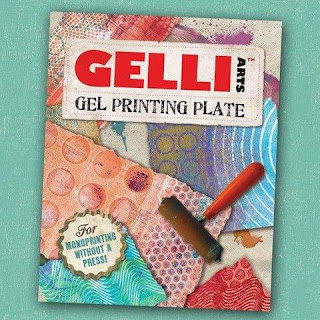
I LOVE creating these one of a kind mono prints. You never know what you are going to get...and that is the beauty of it! I took a mono printing class YEARS ago...like, back when I lived in Dallas kind of years ago. Back then, the way you made mono prints was either with a press (think big and expensive) or by creating a gel printing plate (think jello and disintegration). I had fun...but it seemed like it took such a major commitment to even THINK about making prints. So I was delighted to discover a new tool...the Gelli Arts Gel Printing Plate. It is created of silicone and mineral oil...and doesn't disintegrate! Lovely!
I could hardly wait to get my hands on one! And now that I have it - I find that I want to get it out at least once or twice a week...just to see what I can create. Here is a little introduction tutorial...
If you would like to see the tutorial of how I made this card you can check it out here.
I could have titled this blog...The best messy kind of fun EVER!
I LOVE creating these one of a kind mono prints. You never know what you are going to get...and that is the beauty of it! I took a mono printing class YEARS ago...like, back when I lived in Dallas kind of years ago. Back then, the way you made mono prints was either with a press (think big and expensive) or by creating a gel printing plate (think jello and disintegration). I had fun...but it seemed like it took such a major commitment to even THINK about making prints. So I was delighted to discover a new tool...the Gelli Arts Gel Printing Plate. It is created of silicone and mineral oil...and doesn't disintegrate! Lovely!
 |
| Gelli Arts Gel Plates come in 6x6, 8x10, and 12x14 sizes |
I could hardly wait to get my hands on one! And now that I have it - I find that I want to get it out at least once or twice a week...just to see what I can create. Here is a little introduction tutorial...
So far I have printed on card stock, patterned paper, tissue paper, muslin and deli papers. Every one has it's own benefits... The makers of the Gelli Arts Plate recommend that you use acrylic paint. I have tried several brands and find that you can get great prints even with the very cheapest acrylic paint that you can get at the craft store. For some of the more layered techniques, you may want to upgrade to student grade or artist grade paints...and mix in an extender. To get the best prints (usually two versions each time), you need the paint to stay wet...or fluid.
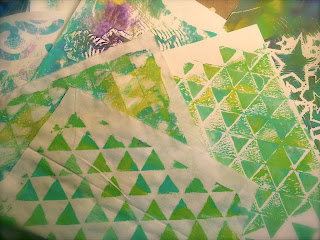
If you have watched the tutorial, you know that I created these with stencils. It is such a GREAT way to use your supplies in a different way! I have so many more combinations I can't wait to try.
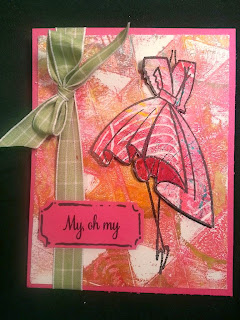
There are also so many things that you can do with your prints. They are great to use for your art journaling, as backgrounds for scrapbook pages, or for cards. Here is a card that I created with a couple of pages of prints.
If you would like to see the tutorial of how I made this card you can check it out here.
I hope I have piqued your interest. I talked with Scott Shaw over at Bluemoon Scrapbooking, and they are now carrying all three sizes of the Gelli Plate. I use the 8x10 Gelli Plate. I like its versatility. If you are a card maker, you may be more interested in the 6x6 size. You all know me...I only want to invest in tools that I will use a LOT! This is one of those tools. I do love the end results...but it is the best thing I have found to overcome "creativity block or lost mojo!" Because it is so freeing, a few minutes spent slopping around with paint, stencils and an assortment of scrapers/texture makers gets my creative juices flowing...and later when I need to be inspired for a project a quick look through my stack of prints often sparks an idea....BONUS!
 |
| Soft Rubber Brayer |
If you are interested in trying this for yourself, you will need a Gelli Plate, a soft rubber brayer and some acrylic paint (whatever kind you already have in your stash)...and most importantly...your playful creative heart! Have Fun!
Products used:


These Gelli Plates are exciting a lot of crafters over here too Jann! My wish list is so long already I don't think it can stand having anything else attached :) I love your enthusiasm for this art and love what you have created.
ReplyDeleteHugs
Lynn xx
Would love to get a Gelli Plate, but in the meantime I had a great time playing with these techniques on a spare "B" plate for my Cuttlebug. What a lot of fun! And I used some water with Perfect Pearls and sprayed away too. Thanks for some cool, fun ideas to play with!
ReplyDeleteYou, my friend, are a "Genius"! I first watched the tutorial on using the Gelli Plate with acrylic paints and stencils. My thoughts were, "that is interesting but how useful would it be?" Girlfriend! You BLEW MY MIND when I saw your video making the card and seeing the finished work!
ReplyDeleteI am really wishing I had time for creative play. Don't know when it will happen again. Until then I will be happy watching you come up with "Fan-tabulous" stuff :D
Love you my friend - Leslie
Jann! You did it again! I love your videos! I can't wait to give this a shot!
ReplyDeleteThanks Robin...these are so much fun to do! The possibilities are endless! Let me know how it goes!
DeleteTis morning I stumbled onto your web site by searching for stencil ideas. WOW! BONUS for me. I have never seen gelli plate and my mind is spinning. Great way to start a new year! I also love all the ideas for different items to use as stencils like a fruit bag and shelf liner. I really need to look at things differently. Thank you and I look forward to seeing more great ideas!! Happy new year
ReplyDelete