Posts

Showing posts from April, 2013

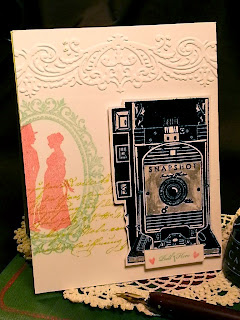
Gelli Printing: Introduction

Image
Oh my friends... I could have titled this blog... The best messy kind of fun EVER! I LOVE creating these one of a kind mono prints. You never know what you are going to get...and that is the beauty of it! I took a mono printing class YEARS ago...like, back when I lived in Dallas kind of years ago. Back then, the way you made mono prints was either with a press (think big and expensive) or by creating a gel printing plate (think jello and disintegration). I had fun...but it seemed like it took such a major commitment to even THINK about making prints. So I was delighted to discover a new tool...the Gelli Arts Gel Printing Plate. It is created of silicone and mineral oil...and doesn't disintegrate! Lovely! Gelli Arts Gel Plates come in 6x6, 8x10, and 12x14 sizes I could hardly wait to get my hands on one! And now that I have it - I find that I want to get it out at least once or twice a week...just to see what I can create. Here is a little introduction tutorial...

Visual Weight: Collage Stamping

Image
I'm introducing a new series. I thought we might go a bit deeper on some projects and look at why certain things work together to make a good design. You know I'm not big on "rules" when it comes to art...so these tutorials will be more focused on why certain elements appeal to us. This first tutorial is about visual weight. Several of you have asked for a tutorial on creating stamping collages - like I have posted the last few days. I created all of these cards  "Thanks" card , "Vintage Camera" card and "Sunflower Collage" card utilizing the concept of Visual Weight. You can see in this picture that I recreated the the background collage first in just black (no attention paid to visual weight) and then with black a grey (using only intensity to create visual weight). Here is the tutorial... Let me know what you think! Have a great week!

Collage Stamping Has Officially Become an Obsession

Image
I seriously love creating these collage stamped backgrounds! Wish I had discovered it sooner! I am so glad that the Papertrey Ink Make It Monday Challenge got me thinking about this technique.  You can check out the beautiful card that Dawn made here. I am preparing for a class I am going to teach - French Country Inspired Projects . I have had fun researching...finding lots of things that will be my inspiration for creating these projects. I have started a Board on Pinterest called French Country. If you would like to check it out - there is a link over in the side bar that will take you to my Pinterest Account. So, as I am preparing for this class the first thing that I did was to look into color combinations and iconic images that would help give my projects the FEEL of French Country. I found that Golden Yellow, True Red and Deep Blues are often used - so I pulled out some of my supplies that might work within these color ranges.                                    

More Collage Stamping: MIM #110

Image
I am having the best time working out these stamping collages! You know I particularly love finding new ways to use supplies I already have...and this technique of using stamps from different collections and pairing them with inks of different intensity to create a cohesive collage is just SO MUCH FUN...and a terrific way to stretch your supplies. Here is a close up...I just love the way the frame draws attention to the silhouetted couple...but because the inks are lighter, the provide balance for the focal image (vintage camera). I also added some embossing to the top because it seemed empty - but I didn't want to add more stamping. Embossing can help you fill space with a bit of texture, but still allows you to maintain the balance of your other elements. The vintage camera is from a stamp set called Shutterbug Special. So very cool - and you can get a matching die...that also cuts that little pull out! Such a great way to add a special sentiment, note or tiny

Collage Stamping: Papertrey Ink Make It Monday Challenge #110

Image
 So...I shared these Easter cards with you...and the tutorial on how to create these dimensional speckled eggs by creating a template with a Papertrey Ink Egg Die.  If you missed it, you can check out the tutorial here.   I had so much fun making these eggs, that I ended up with several card fronts that I didn't turn into Easter cards. I just love those speckled eggs.  When I went to check out this week's Papertrey Ink Make It Monday challenge , I knew I wanted to use some of those extra card bases. The challenge was to do 'collage stamping' - layering different stamps with various inks to create a collage. Since my spotted eggs were created with ink...I felt like they would be a great foundation for my collage. Here is how it turned out...Love it! I used the following Papertrey Ink stamps:  Background Basics-Farm and Barn; Fancy Flourishes; and Thanks All Ways. I also used a Stampers Anonymous Script stamp. Here is a closer view...love how

Easter Cards - Watercolored Eggs Technique

Image
Yes...I do realize that it is three days AFTER Easter...but I never got these posted for you guys...and I wanted you to have the tutorial for how I created these eggs...because I have another card or two to share with you that I used some of these eggs to make as well! (I know! Bonus!) I have been seeing a lot of speckled eggs on Pinterest. I just LOVE them...and I wanted to figure out how to make them for myself. After I thought about it awhile, I realized that I could probably get a good dupe if I used my distress stains and created an egg shaped template with a die. Here is a video tutorial...it is REALLY simple to make these dimensional eggs...and even if it is past Easter - I will be back to share a card I made with some of my "extra eggs!" Are you as surprised as I was by how quickly they come together and have a real dimensional effect?!?! I couldn't help myself...I made all my cards and then made a few extra....which you will se