Posts

Showing posts from 2013

So far behind…but running to catch up!

Image
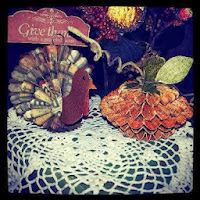
Check out these Quirky Turkeys and Funky Punkins Does that ever happen to you? You run out of hours in the day before you run out of things to do?!?! Seriously! LOL I feel like I have been sprinting since July! I have lots of things to catch up on with you - my dear friends! But I will try and do it a little at the time! First of all…HAPPY THANKSGIVING! Here is just a quick OVERVIEW…and I will be back to fill in the details soon! I have some new tutorials up on YouTube with some Christmas projects…I will put the links here… I am working on creating a classroom here on the blog - and sharing my first on-line class called All That Glitters ! It is going to be fun…and pretty economical…like $15! I've also started a new series over on YouTube… Trending Techniques . The first one focuses on the Inlaid Die Cuts….such a hot trend…and super easy to accomplish….check out this video to learn how. This will be kind of a RANDOM series…as I find trends

I've been busy...

Image
Working on my Christmas Cards and creating some goodies to sell at a couple of Fall Craft Fairs. I hope to have some new videos to share soon...but thought I would put a few pictures of some of the cards and card sets I have been working on. I love these blueprint stamps by Tim Holtz. They are perfect for doing the Faux Chalkboard Stamping technique. I have a video that demos that technique - you can watch it here :  These next few sets were a lot of fun to make! I started by embossing watercolor paper...and then used various sprays (Lindy's Starburst stains, Heidi Swapp Colorshine, Dylusion Sprays) to create these colorful splats. I love how bright and fresh these cards turned out. Those Dylusion Sprays are just so fun to work with...and get great results every time! When they had dried - I just did I direct to paper technique with Distress Inks to highlight the embossing. Fun and Fresh...great for any occasion. These next two cards, I have crea

I haven't lost my mind...

Image
Christmas Card Series 2013 YouTube Play List Hello my friends! Don't call the men in the white coats just yet...I KNOW it isn't even close to Christmas yet...but one of my goals for this year is to send out only handmade cards...so I am starting now! I thought some of you might want to join me - so I am going to do a mini series - focusing on cards that you can make multiples of fairly easily. Later (much closer to Christmas), I will come back and do a few "special" Christmas projects...gifts, home decor, mini albums and some extra special cards. Even if you aren't ready to join me in my quest to get my Christmas cards done, I hope you will be inspired by some of the techniques I will be sharing with you and you can try them on some other types of cards. Today, I am going to share two techniques. The first is LAYERED Backgrounds - combining a cover plate die with a background that has been texturized (either with an impression plate or an embossing fold

Gelli Printing: Introduction

Image
Oh my friends... I could have titled this blog... The best messy kind of fun EVER! I LOVE creating these one of a kind mono prints. You never know what you are going to get...and that is the beauty of it! I took a mono printing class YEARS ago...like, back when I lived in Dallas kind of years ago. Back then, the way you made mono prints was either with a press (think big and expensive) or by creating a gel printing plate (think jello and disintegration). I had fun...but it seemed like it took such a major commitment to even THINK about making prints. So I was delighted to discover a new tool...the Gelli Arts Gel Printing Plate. It is created of silicone and mineral oil...and doesn't disintegrate! Lovely! Gelli Arts Gel Plates come in 6x6, 8x10, and 12x14 sizes I could hardly wait to get my hands on one! And now that I have it - I find that I want to get it out at least once or twice a week...just to see what I can create. Here is a little introduction tutorial...

Visual Weight: Collage Stamping

Image
I'm introducing a new series. I thought we might go a bit deeper on some projects and look at why certain things work together to make a good design. You know I'm not big on "rules" when it comes to art...so these tutorials will be more focused on why certain elements appeal to us. This first tutorial is about visual weight. Several of you have asked for a tutorial on creating stamping collages - like I have posted the last few days. I created all of these cards  "Thanks" card , "Vintage Camera" card and "Sunflower Collage" card utilizing the concept of Visual Weight. You can see in this picture that I recreated the the background collage first in just black (no attention paid to visual weight) and then with black a grey (using only intensity to create visual weight). Here is the tutorial... Let me know what you think! Have a great week!